How to Prepare Your Travel Trailer and RV for Spring: The Complete De-Winterization Guide

After long winter months, your travel trailer, RV, or motorhome is finally coming out of hibernation. But before heading out to your first campground of the season, one essential step is a must: de-winterizing your RV. This complete guide walks you through everything you need to check, step by step, for a safe and stress-free start to the camping season.
WHAT IS RV DE-WINTERIZATION?
De-winterization — also called spring startup, seasonal RV preparation, or RV recommissioning — refers to all the steps required to get a travel trailer or RV fully operational again after winter storage. During winter, several systems are shut down or protected against freezing temperatures. Before using your RV again, everything needs to be inspected, cleaned, and reactivated to ensure a safe and enjoyable trip.
Why is de-winterization important before camping?
Winter freezing temperatures can cause micro-cracks in pipes, drain batteries, damage seals, and weaken tires. Without a complete inspection, you risk water leaks, electrical issues, or even propane leaks at the campground. De-winterization protects both your investment and your family’s safety — and helps avoid ruining your first camping trip of the season.
STEP 1 — FLUSHING AND RECONNECTING THE WATER SYSTEM
One of the first tasks when recommissioning a travel trailer is thoroughly flushing the plumbing system. In the fall, non-toxic RV antifreeze is added to the pipes during winterization to prevent freeze damage. Now, every trace of that product must be removed before use.
- Connect the RV to a clean water source (city water or freshwater tank)
- Open all faucets: shower, bathroom sink, kitchen sink, toilet, and if applicable, washer, dishwasher, and outdoor shower
- Run the water until it becomes clear, odorless, and color-free
- Refill your water heater tank if it was emptied during winterization. If your RV has an on-demand water heater, it must be properly de-winterized by opening the exterior pressure relief valve until the water runs clear. Proper winterization and de-winterization of tankless water heaters is essential for correct operation in spring
- If your unit includes a water filtration system, replace the water filter after de-winterization
How long should you flush the system to remove antifreeze?
Generally, running water for 5 to 10 minutes at each faucet is enough to completely eliminate non-toxic antifreeze. The water should be odorless and clear before considering the process complete.
STEP 2 — INSPECTING PIPES AND CHECKING FOR LEAKS
While flushing the system, visually inspect all fittings, pipes, and seals under cabinets, in storage compartments, and behind access panels. Freezing temperatures can create tiny cracks that only appear under pressure. It’s much better to discover them in your driveway than at the campground.
- Check under sinks and around the water heater
- Inspect the water pump connections for leaks
- Test drain valves to ensure they are fully closed
- Inspect gray and black water tank
STEP 3 — BATTERY, ELECTRICAL SYSTEM, AND SAFETY DEVICES
Your RV or trailer battery may have partially discharged during winter, even while in maintenance mode. Here’s what to check during your electrical inspection:
- Reconnect the battery (or reinstall the battery removed for winter storage)
- Check battery charge level and inspect terminals for corrosion
- Test all interior and exterior lights (LED and conventional)
- Check all 12V and 120V outlets
- Test the water pump, electric water heater, and any other onboard electrical systems
- Inspect carbon monoxide, smoke, and propane detectors — replace batteries if needed
- Check the converter/charger and solar panels if applicable
Should detector batteries be replaced every year?
Yes, it is strongly recommended. Smoke and carbon monoxide detectors are critical safety devices. Replace the batteries every spring during de-winterization to ensure proper operation throughout the camping season.
STEP 4 — PROPANE AND GAS APPLIANCES
Propane appliances — including the refrigerator in gas mode, water heater, stove, and furnace — must be checked carefully. An undetected propane leak can create serious fire or poisoning hazards.
- Slowly open propane tanks and listen for hissing sounds
- Apply a soapy water solution to fittings to detect bubbles
- Light the stove and furnace burner — the flame should be blue and steady
- Test the refrigerator in propane mode and 120V mode
- Check propane tank recertification dates (required every 10 years)
If you suspect a leak or faulty appliance, contact a technician rather than taking unnecessary risks.
STEP 5 — TIRES, BRAKES, SUSPENSION, WHEEL BEARINGS, AND CHASSIS
Winter temperature fluctuations significantly affect tire pressure and tire condition. An underinflated or cracked tire can blow out on the highway — a dangerous situation you definitely want to avoid.
- Inflate tires according to manufacturer specifications (usually found on the trailer label)
- Inspect tread for wear, cuts, or sidewall cracking
- Check the spare tire
- Inspect wheel bearings annually for each axle and replace if necessary
- Test electric trailer brakes using the tow vehicle brake controller
- Lubricate the hitch coupler and stabilizers
- Inspect the chassis, frame rails, and wheel mounting points for rust or damage
STEP 6 — WATERPROOFING: ROOF, SEALS, AND CAULKING
Water infiltration is the number one enemy of any travel trailer. Road conditions, freezing, and thawing weaken silicone and rubber seals around windows, skylights, air conditioners, and antennas. Preventive maintenance early in the season can save you from expensive repairs later.
- Carefully inspect the roof by walking on it only if your model allows it
- Examine all rubber and silicone seals around openings
- Look for bubbles, peeling areas, or gray spots on the roof membrane
- Inspect walls, corners, and lower panels for leaks or water damage
- Apply RV roof sealant to suspicious areas
How often should RV seals be inspected?
We recommend performing a full seal inspection every 3 months maximum to avoid unpleasant surprises.
STEP 7 — INTERIOR CLEANING, AIRING OUT, AND MOLD INSPECTION
After winter storage, the inside of your RV needs proper ventilation and deep cleaning. Residual humidity can encourage mold growth or attract rodents.
- Open all windows and let the RV air out for several hours
- Inspect corners, under benches, and behind furniture for rodent activity or mold
- Clean the refrigerator, oven, stove, and bathroom
- Check tank drainage areas for signs of rodents
- Vacuum mattresses, cushions, and carpets
- Inspect mattresses for humidity or stains and air them outside if possible
- Restock cabinets with your camping essentials for the season
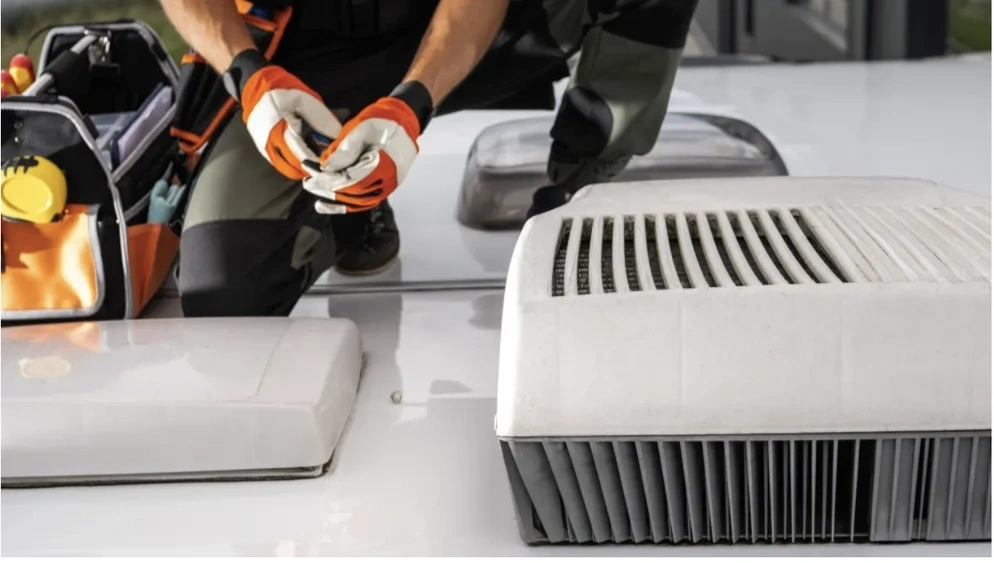
HOW MUCH DOES PROFESSIONAL RV DE-WINTERIZATION COST AT ROULOTTES RÉMILLARD?
Prefer leaving your RV spring startup to professionals? At Roulottes Rémillard, our certified technicians handle everything quickly and thoroughly.
Complete travel trailer de-winterization: $102.44
Complete motorhome de-winterization: $196.90
Complete de-winterization service
These rates include a full plumbing inspection, electrical system check, propane appliance inspection, and a complete vehicle condition report. A worthwhile investment for total peace of mind before your first trip.
Is it better to de-winterize your RV yourself or hire a technician?
Both options are valid. Experienced DIYers can handle most tasks themselves. However, certain inspections — especially propane systems, electric brakes, and safety devices — require expert knowledge. Hiring a certified technician ensures a complete inspection and detailed report, which may also be required by insurance companies in the event of damage.
DO A TEST RUN BEFORE YOUR FIRST BIG TRIP
Once de-winterization is complete, don’t immediately leave for a long journey. Spend a test night in your driveway or at a nearby campground to make sure everything works properly: hot water, propane appliances, electricity, air conditioning, or heating depending on the season. It’s also the perfect opportunity to make a checklist of missing items or forgotten accessories.
FAQ — FREQUENTLY ASKED QUESTIONS ABOUT RV DE-WINTERIZATION
When should you de-winterize your RV in Quebec? Most Quebec campers de-winterize their RVs between late April and early May, once the risk of nighttime freezing temperatures has passed. Avoid refilling the water system if temperatures can still drop below freezing overnight.
Can you de-winterize an RV without a potable water hose? Yes. You can fill your freshwater tank manually and use the onboard water pump to circulate water through the plumbing system and flush out the antifreeze.
How long does RV de-winterization take? Between 2 and 4 hours depending on the size and condition of the RV. A professional technician can usually complete the process in under 2 hours thanks to specialized tools and experience.
Book your appointment here — it’s simple and can save you a lot of headaches at the start of the season!
ROULOTTES RÉMILLARD — THE TRUE RV AND CAMPING EXPERTS IN QUEBEC!